Showing posts with label altered art. Show all posts

Monday, October 3, 2011

Ornament

 
I made these ornaments for each of the girls on our Florida getaway. I cut the letters out with vinyl and cut some scrapbook paper circles and put them in the bulb. Easy schmeasy!

Peace & Pretty Paper,
Robyn

Sunday, November 21, 2010

Diaper Wreath

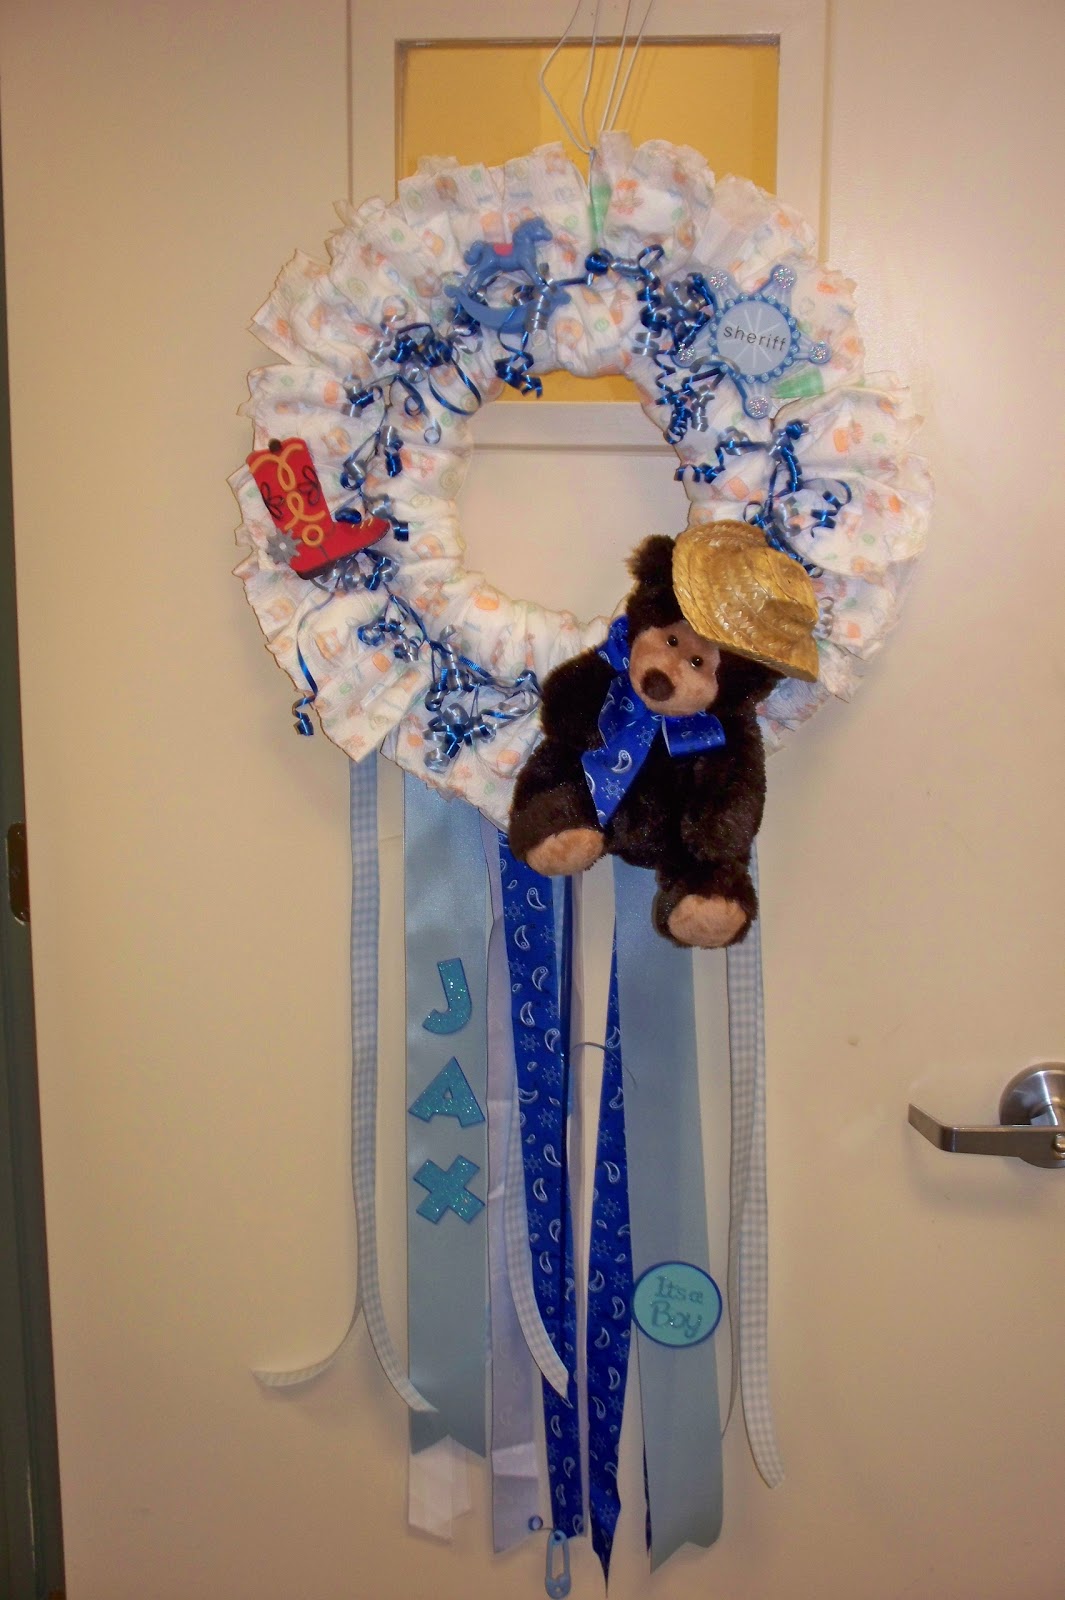
I made this wreath from disposable diapers for one of my favorite people at work. Joy & Brad Hamann welcomed Jax Kinnick Hamann to the world on Thursday, November 18th. He is a big guy, 9 lbs 2 ozs and 22" long. I cant wait to hold the little guy! I saw one of these while looking for ideas for hospital door banners online. It was super easy and fun to make. If you want to make one and need some tips, give me a holler!
Peace & Pretty Paper,
Robyn


Saturday, May 8, 2010

Baby Shower Gifts

I made the following for baby shower gifts. First is the name plaque that I created from a metal "scroll" sign that I got for $6 on clearance at Hobby Lobby. It had "love" and crosses all over the front and was oriented portrait style. I covered it with paper that coordinates with the nursery colors and added the oval with the baby's name. Two holes drilled in the metal allowed me to thread some ribbon to hang it landscape for a nice gift. I am quite pleased with the outcome.
I also made a BABY mini album and a Grandma's Brag Book (that I forgot to take a photo of). Look at the cute little monkey from create a critter. I just love him!
This is the back of the album and there are 2 "micro mini" albums inside to add additional photos. I hope you like it! 
It has been a rough week for me but I am thankful to have "made it" to the weekend. Mike and I just returned from a nice dinner date at Clear Springs and are looking for a movie to watch on PPV. Happy Mother's Day to all of my blog friends out there. Be sure you tell your mother you love her - you never know when it will be your last opportunity.

Peace & Pretty Paper,
Robyn

Thursday, January 28, 2010

Cookie Exchange Recipe Books

I hosted a Cookie Exchange in December and we had a great time. Everyone brought a copy of their recipe. I finally made a cookbook for everyone that came.  I used my favorite mini album item, paper bags.  All of the paper is from my stash so they are all different.  I didn't want to embellish them too much since they will be used in the kitchen. I hope to make the Cookie Exchange an annual event. There are several pockets to add more recipes to next year and the year after! Now to get them all delivered!

***Melody, if you are reading this, I just noticed I put your maiden name on your recipe. oops ..
I'll have to fix that before I deliver them.


Posted by Picasa

Sunday, December 20, 2009

Another Glass Block

On this one I covered the entire block with etching cream then I made a stencil with my Cricut and painted the letters with Stickles. I think it came out pretty cute.

I made it for my friend at work, Miriam (or Mimi as we lovingly call her). She is a Brazilian mess! She has a shirt that has this quote on it and it fits her perfectly. I hope she enjoys it.

Thursday, December 17, 2009

Etched Glass Block

I couldn't get a good picture of this to save my life. It is my first attempt at using the glass etching cream. I cut "LET IT SNOW" out with the Storybook cartridge and placed them on the clean block. I cut several snowflakes from a couple of other cart and placed them randomly around the phrase. I brushed the etching cream on with a foam brush and left it on for almost 30 minutes although the directions suggest 10. Rinsed it off with cool water and pulled the vinyl off. The photo doesn't show it but I glued (spray adhesive) a pretty piece of of Bo Bunny paper on the back to coordinate with the snowflakes and ribbon color. A 25 count strand of clear lighs looks very pretty inside. It is much prettier in person - I promise.

CLICK ON PHOTO TO ENLARGE 

Posted by Picasa

Tuesday, October 6, 2009

BOO!

I got these letters  for $1 at JoAnn Fabrics and painted them black and put paper on top with Mod Podge. I have no idea what I am going to do with them but they were fun to make!

Friday, September 4, 2009

Scrap Room Door Hanger

I got these out of the dollar bin at Michaels. They were for a little boy's room. I covered them with paper and flowers. I printed the text on my computer and cut them out with my new Spellbinder Nestabilities - I like them & look forward to making some more goodies with them! I tied a bow on top and had a cute little gift when I was done.


Toilet Paper Roll Mini Album - Disney Style

These are fun fun fun to make (and simple too)! I made these little mini albums to give to my Disney girls at our Scrapper's Dream Vacation at Disney last week. I took 3 empty toilet paper rolls and flattened them. I ran my bone folder back and forth over the edges to try and flatten a little more.
Next I covered them with paper and embellished with lots of Disney goodies and paper. This is also a good time to set them under a stack of books for a few hours to flatten them some more.

I made the tags with my cricut Mickey Font cartridge and design studio. As an after thought, I embossed one with my cuttlebug. These tags are good for adding photos or journaling.
I bound it with the Bind-It-All and added ribbon. All done!

I am happy with the finished product and I think they liked them! I am looking forward to seeing them after our great photos are added.

Sunday, June 21, 2009

Recipe Box

I made this for my son Matthew for Christmas but actually just finished it. I know it's June but don't be too hard on me. He actually ended up moving back home for a while so he hasn't needed it recently. Hayley has requested one too. I liked this project!

He is always asking me how to make this or that and I realized most of my recipes are in my head and not on paper. I really had to think hard on how to make a recipe box for a guy. I wanted to make it fun and not too feminine. I also wanted it to be something that he could share with his wife someday. - I loved this paper!!!!The background looks like recipes and clippings you would find in your grandma's kitchen. There are even a few food stains thrown in for fun. I sanded & painted the $3.00 box inside and out and then added the paper to the ends, "recipes" to the front and mod podged the whole thing. I wanted it to wipe clean easily in case it gets dirty. The mod podge achieved that. I bought some chipboard dividers and had to trim them just a little and covered them with different colored papers and used my label maker for the tabs.

I used lined large index cards for the recipe cards and ran them all through my printer to personalize them a little. I added several favorite recipes and had his aunt add some as well. I think it's important to have them in our own handwriting to make them a little more special. I have one recipe that my mother hand wrote for me years ago and I have it preserved in a zip lock bag because it is beginning to deteriorate. I have a special feeling when I see it in her own hand writing. I need to give some blank cards to his great aunts so they can do the same. I printed plenty of blank cards so he can add to it as needed.
I hope you like it!
Posted by Picasa